
[ad_1]
Desk of Contents[Hide][Show]
Find out how to construct your individual egg incubator to hatch fertilized rooster eggs into wholesome, medication-free chicks. This ingenious DIY challenge prices lower than $20 and is an choice even for these whose neighborhood codes don’t enable for a rooster!

Final 12 months, throughout the world’s-longest-lockdown in Melbourne, Australia, we skilled our first-ever
rooster scarcity.
Everybody wished to maintain chickens whereas they have been staying at dwelling, however the native farms shortly ran out of obtainable chicks.
Concurrently, egg costs took a pointy rise – rising to as a lot as AU$18 per dozen at natural shops (equal to US $12.00 per dozen).
In consequence, my children and I began various means for hatching our personal chicks.
Mail Order Fertilized Eggs
Since our neighborhood doesn’t enable roosters, we determined to purchase fertilized eggs on-line from breeders via native networks.
On condition that fertilized eggs can final for a number of weeks with out incubation (hatchability begins dropping solely after seven days), sending them by way of submit was a viable choice.
Surprisingly, many individuals don’t know about this!
Shopping for vs Constructing an Incubator
Incubators can value wherever from $50 to a whole lot of {dollars} for the very best fashions.
To maintain issues as budget-friendly as doable, we began choices to make one ourselves.
Our DIY incubator directions are outlined intimately under.
Why Hatch Your Personal Chicks?
Hatching your individual chicks has a myriad of advantages.
For starters, it means you can be nearly totally self-sufficient with out dependence on farmers or egg suppliers.
You too can select your individual breed of hen, akin to heritage breeds which lay properly, and produce extra nutrient-dense eggs.
As well as, you even have the chance to lift wholesome, thriving chicks from delivery.
This enables for controlling each their feed provide and avoiding any required medicines (together with mRNA vaccination) which may happen in standard farm practices.
Constructing a DIY Egg Incubator
The aim of constructing an incubator is to create the identical setting that may happen underneath a broody hen.
The important thing elements are temperature and humidity.
Humidity
The humidity for the primary 18 days needs to be round 40-50%, then rising as much as 65-70% after day 18.
You’ll be able to management the humidity by inserting a small dish of water throughout the incubator and gently spraying a
water mist all through the air.
Temperature
Whereas humidity is vital for top hatch charges, temperature management is essential.
The vary should stay secure within the vary of 37-39 levels Celsius (98.6 – 102.2 levels Fahrenheit) all through the incubation interval.
Tools You Will Want
There are 5 gadgets you will have to assemble with the intention to construct a DIY incubator.
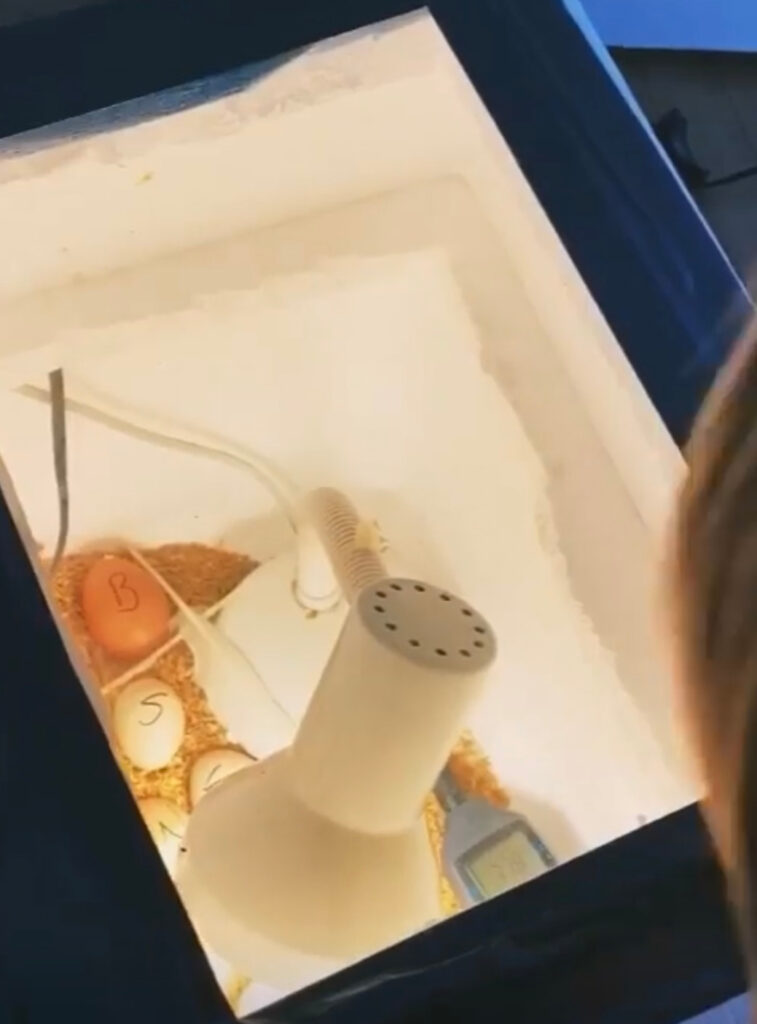
Incubator Field
The field wants to securely insulate the eggs in order that the temperature stays fixed.
It additionally wants to have the ability to accommodate the lamp with loads of house, and have room for the glass window on the prime.
Polystyrene or timber are normally the very best choices as they insulate warmth properly and are pretty sturdy.
We’ve got a small timber field that we place inside the big polystyrene field in order that the eggs have loads of insulation round them.
Temperature and Humidity Gauge
A temperature and humidity gauge (like this one) is the one merchandise that we bought for the incubator setup.
It exhibits the temperature and humidity so to monitor it persistently from outdoors the incubator window.
They value about $10-20 from a ironmongery store or on-line.
When you aren’t in a position to get one in every of these, the following best choice can be a thermometer or related.
Warmth Lamp
A lamp with an incandescent bulb will maintain the temperature fixed throughout the incubator.
Whereas you should purchase warmth lamps or bulbs (globes) inexpensively from most {hardware} shops, a bedside lamp with an incandescent bulb might do the trick.
On condition that the incubator is properly sealed and enclosed, most industrial warmth lamps truly get the setting too sizzling.
We began out with a really useful warmth lamp however discovered the temperature was too excessive contained in the incubator.
With some extra experimenting, we discovered that our bedside lamp with an incandescent bulb or globe labored greatest!
The correct temperature is a ‘make or break’ think about guaranteeing the chickens hatch appropriately.
So it’s value organizing a warmth supply and temperature gauge properly earlier than you order any eggs.
Depart the warmth lamp and temperature gauge within the field for a number of days and examine that the temperature stays fixed all through this time.
You might want to regulate the warmth supply or incubator design over the approaching days to get it excellent.
Glass Panel
A glass panel creates a ‘window’ into the incubator so to see the eggs and examine the temperature with out having to open the field.
We use a glass pane from an previous photograph body and lower this onto the highest part of the incubator field, securing the perimeters with robust tape.
Egg Rack or Woodchips
You’ll need a floor for holding the eggs sturdy, ensuring that they don’t roll over or stumble upon one another.
Sawdust and woodchips work properly for us, however I’ve seen incubators with wire racks (like a cookie tray) and straw bedding.
Right here’s a comparability of the assorted sort of rooster bedding so that you can take into account.
Find out how to Assemble
Put your incubator collectively and examine that the window is well-sealed and that the temperature and humidity stay fixed.
When your eggs arrive, mark every one on one aspect with a marker pen earlier than inserting them within the field.
As soon as the incubation course of begins, you will have to show them 2-3 occasions on daily basis. The egg markings will assist you to to recollect which of them want turning.
Beneath is an image of our DIY egg incubator holding some fertilized eggs heat!
Hatching Course of
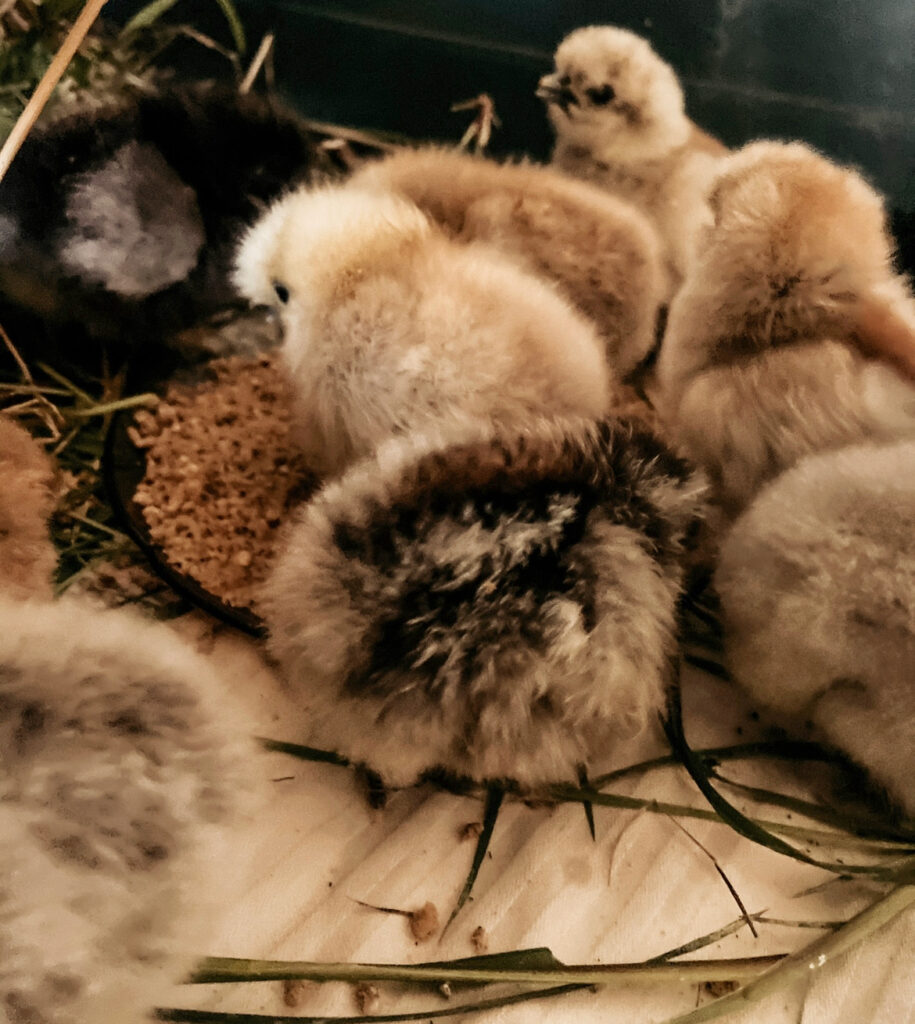
The fertilized eggs will hatch within the incubator after roughly 21 days.
By comparability, eggs stored heat underneath a broody hen take a bit longer at about 25 days.
You’ll be able to anticipate a hatch fee of roughly 75%.
Notice that about half of the eggs that hatch will probably be roosters, so make plans to present any cockerels to buddies who additionally maintain chickens in case your neighborhood doesn’t enable them.
Regionally owned feed shops can provide the location of the closest rooster sanctuary as properly.
The method of eggs hatching in your do-it-yourself incubator ought to progress as described under to imitate the pure conduct and results of Mama Hen.
Days 1-18
It is rather vital to maintain the temperature constant and the humidity between 40-50% throughout this time.
Gently flip the eggs 2-3 occasions each day and monitor the temperature and humidity gauge via the incubator window.
Days 18-21
Throughout the previous few days of incubation, the humidity wants to extend to 65-70%, and the eggs now not require turning.
Watch them fastidiously via the incubator window to see any indicators of hatching.
Use this time to arrange a brooder field full with wooden shavings, unmedicated soy-free chick starter, contemporary water, and a warmth lamp so that you’ve a spot to care on your newly-hatched child chicks.
Incubators vs Broody Mom Hens
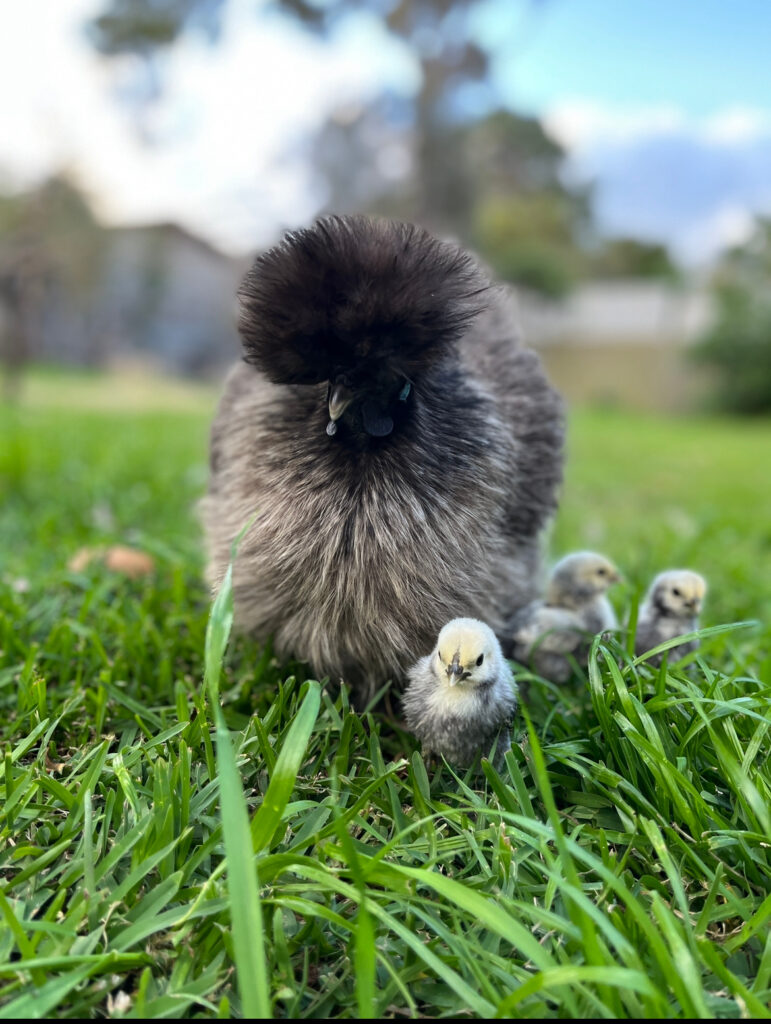
After all, essentially the most ‘pure’ setting for a child chick to hatch in is underneath a mom hen.
With this in thoughts, we purposely select a number of birds inside our brood that make distinctive moms.
Silkies, Cochins and Frizzles are a number of good examples.
If the timing is true, we place the fertilized eggs underneath the mom hen and skip the incubator course of altogether.
Once I discuss with ‘timing’, I imply the season when mom hens turn out to be ‘broody and like to sit down on eggs and hope that they hatch.
Heritage breeds of hens usually have a greater capability to do that, as their egg-laying cycle is predicated on a hormonal cyclical sample.
Trendy egg-laying rooster breeds lay extra regularly, however this pure sample of broodiness hardly ever happens.
If the fertilized egg supply is timed properly, you possibly can place the eggs underneath the hen once they arrive by submit.
Typically, nonetheless, hens get broody, after which change their thoughts, so the incubator could be a wonderful backup choice in that situation.
What may also occur (by pure luck or coincidence) is that the hens turn out to be broody concurrently the chickens hatch within the incubator.
If you’re fortunate sufficient to have this happen, the infant chicks could be adopted by the broody mom. Place them beneath her throughout the evening to begin the method.
This eliminates the necessity for a brooder field altogether.
[ad_2]